today I will boast a bit;)
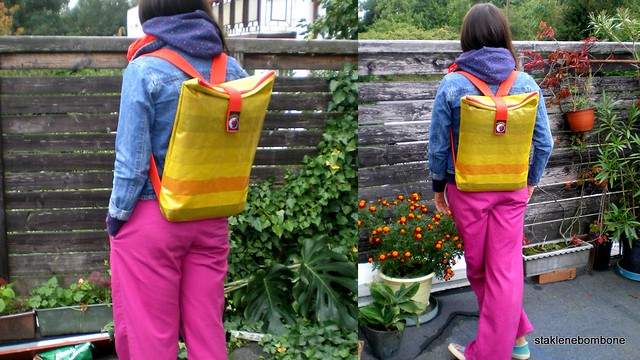
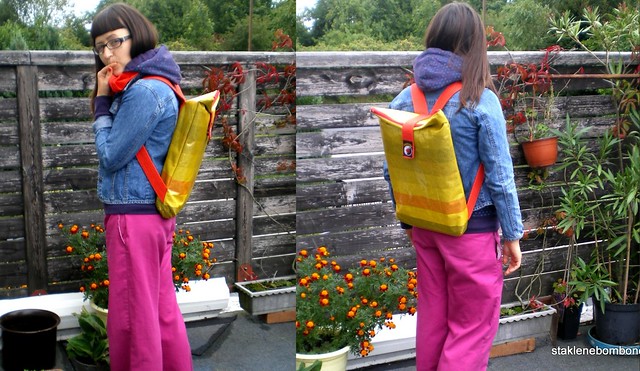
I have been dreaming of a laptop backpack for a while - I'm tired of my old, dull laptop bag and of dragging the computer on one shoulder. it just doesn't seem healthy nor comfortable any more.
I wanted us to make sth simple, safe and practical, sth I could use every day, no matter the weather conditions. it's designed the way it fits all the basics: a computer, cords, an agenda and some files.
MATERIALS
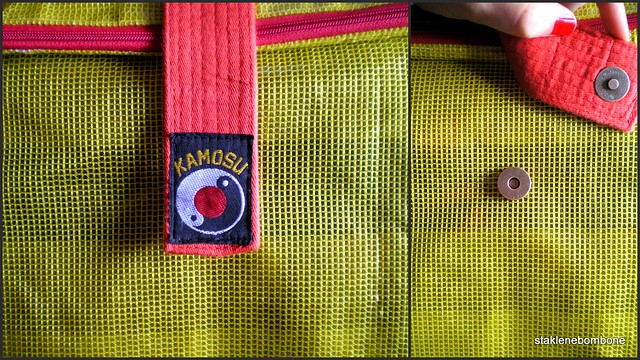
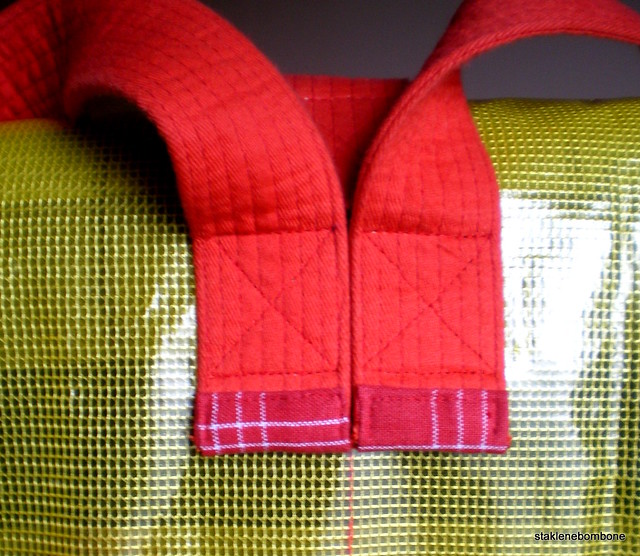
the most important thing was to get a waterproof fabric - we were lucky to find a second hand bag with large yellow panels that we used as the external layer of the backpack. it's a half-transparent, waterproof plastic strenghten with a thread-net inside. the stripped fabric underneath and the red cotton lining are both second hand and so is the belt. actually, the belt makes a funny story - we were looking for a strong, wide, but not too hard belt or a fabric tape and in the end we've found a karate belt that felt simply perfect! I liked the belt so much that I decided we'll keep the original 'kamosu' label.
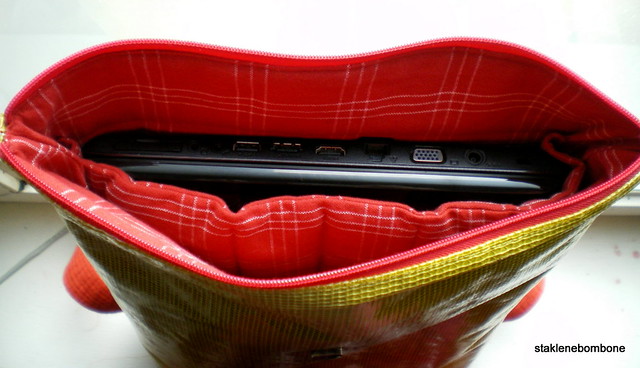
sewing any laptop bag you'll also need to get a sponge-a-like material to make it safe enough for a computer (tip: you may reuse an old karrimat).
SEWING/SHAPE
I wanted the backpack to look flat, without losing space, so we decided to cut all the major pieces of fabric rhombus-shape - with the down corners pulled to the inside it makes the front look rectangular and you get some extra space on the botton (depth).
inside there is also a padded 'sleeve' for the computer and a pocket with a zipper.
the lower end of the belt is sewn into the backpack's seam to make it stronger.
if you have enough materials, you should go for a longer folding part - our is maybe a bit too short, but it's all we could do with what we had;)
oh, and I officially say 'thank you' to my mom for taking some of the pictures below!
I have been dreaming of a laptop backpack for a while - I'm tired of my old, dull laptop bag and of dragging the computer on one shoulder. it just doesn't seem healthy nor comfortable any more.
I wanted us to make sth simple, safe and practical, sth I could use every day, no matter the weather conditions. it's designed the way it fits all the basics: a computer, cords, an agenda and some files.
MATERIALS
the most important thing was to get a waterproof fabric - we were lucky to find a second hand bag with large yellow panels that we used as the external layer of the backpack. it's a half-transparent, waterproof plastic strenghten with a thread-net inside. the stripped fabric underneath and the red cotton lining are both second hand and so is the belt. actually, the belt makes a funny story - we were looking for a strong, wide, but not too hard belt or a fabric tape and in the end we've found a karate belt that felt simply perfect! I liked the belt so much that I decided we'll keep the original 'kamosu' label.
sewing any laptop bag you'll also need to get a sponge-a-like material to make it safe enough for a computer (tip: you may reuse an old karrimat).
SEWING/SHAPE
I wanted the backpack to look flat, without losing space, so we decided to cut all the major pieces of fabric rhombus-shape - with the down corners pulled to the inside it makes the front look rectangular and you get some extra space on the botton (depth).
inside there is also a padded 'sleeve' for the computer and a pocket with a zipper.
the lower end of the belt is sewn into the backpack's seam to make it stronger.
if you have enough materials, you should go for a longer folding part - our is maybe a bit too short, but it's all we could do with what we had;)
all in all, I couldn't be happier with how the backpack turn out - it fits great, looks good and cost us close to nothing! hope you'll like it too.
sorry for the lack of pictures of work in progress, but this time we were just too lazy to take them (admit) ;) besides, this yellow plastic doesn't photograph easy...
sorry for the lack of pictures of work in progress, but this time we were just too lazy to take them (admit) ;) besides, this yellow plastic doesn't photograph easy...
oh, and I officially say 'thank you' to my mom for taking some of the pictures below!
take care!
-oh

2 comments:
Kako si kreativna! I meni treba ovo pod hitno! Javim ti se sa pitanjima ako gdje zapnem!
eh, hvala, ali ova kreativnost deli se ipak na dve osobe - taj ranac ne bi izgledao tako, da ne bi bilo mog omiljenog krojaca;)
odgovoricu na sva pitanja!
Post a Comment