
hey, hey!
I
don't like watches - they are vicious little machines that instead of
helping you to be on time, show how late you actually are :) but
anyway, once, being in lisbon I found a watch that felt like mine:
simple in form, but red with white polka dot pattern. it was cheap, a bit trashy
and it made me wander if I can break the chain and start working on
my punctuality. I bought it and I wore it for quite some time.
I found it in one of the boxes last
summer – it needed a new battery and it was painfully obvious that
it's time for a new belt. and here we go!
materials: scissors, measuring tape,
strong (but not too thick!) fabric of a chosen colour/pattern, a
magnet popper (or a hook and loop fastener), interfacing fabric,
iron, sawing machine
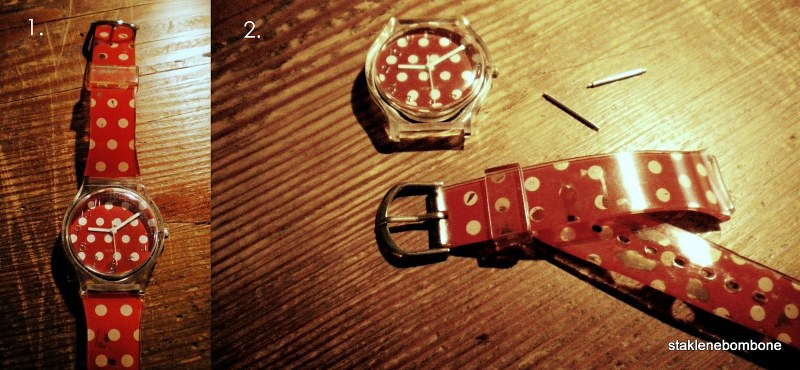 step 1, 2: remove the old belt (it shouldn't be difficult, but be careful not to break any part). make sure you secure the “pins” that hold the belt, we're going to need them!
 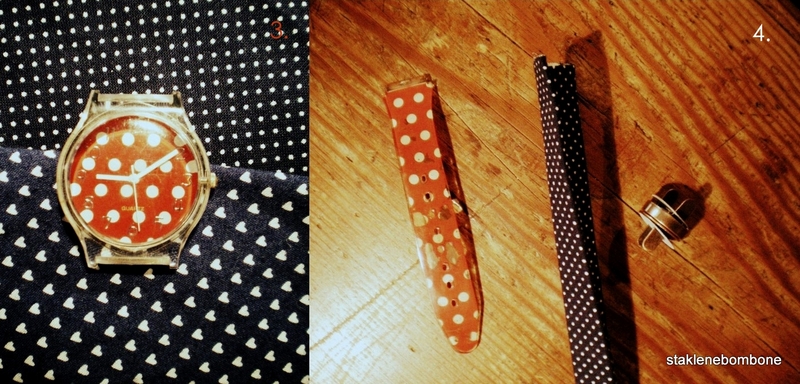 step 3: chose fabric for your belt
step 4: measurements: a/ measure the width of your old belt – the new one should be just as wide, b/ make sure that the popper you're going to use isn't too large/small for that width, c/ use a measuring tape to measure your wrist and decide how long your new belt should be. add about 5 mm from each side to close the belt. I wanted mine to fold around a wrist twice, so I've made it longer. you have the measurements of your belt? great, now multiply the width by 4 – you need to do it in order to fold the edges to the inside so that nothing unravels. it will also make your belt stronger.
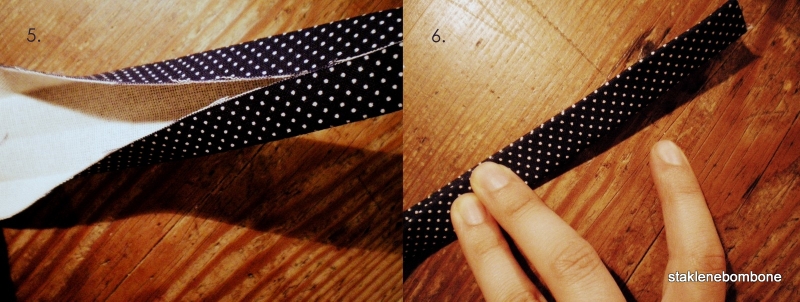 step 5: now, cut the fabric and iron the interfacing (in the picture it's the white “inside” of the belt). to secure all the edges and come back to the original width of your belt (now it's 4 times as wide as it should be at the end) you have to fold it in half (length) and iron this fold (the interfacing should be inside). You have two “halves” now and each of them should be folded once more (the edge of each half should reach the line made by the first fold). it all sounds a little complicated but it's actually really easy, you can try with a piece of paper first!
 step 6: your edges are “inside” the belt. you can take the sewing machine now and sew the belt on both sides and ends keeping the seem pretty close to the edges. TIP 1: before you start sewing, make sure how your popper should be attached – some of them must be attached before the sewing. a hook and loop fastener could also be a good idea here – you can saw/glue it after you've sawn the belt. TIP 2: it's best to start sawing with closing the ends of the belt: you should fold the belt about 5 mm to the inside and sew it.
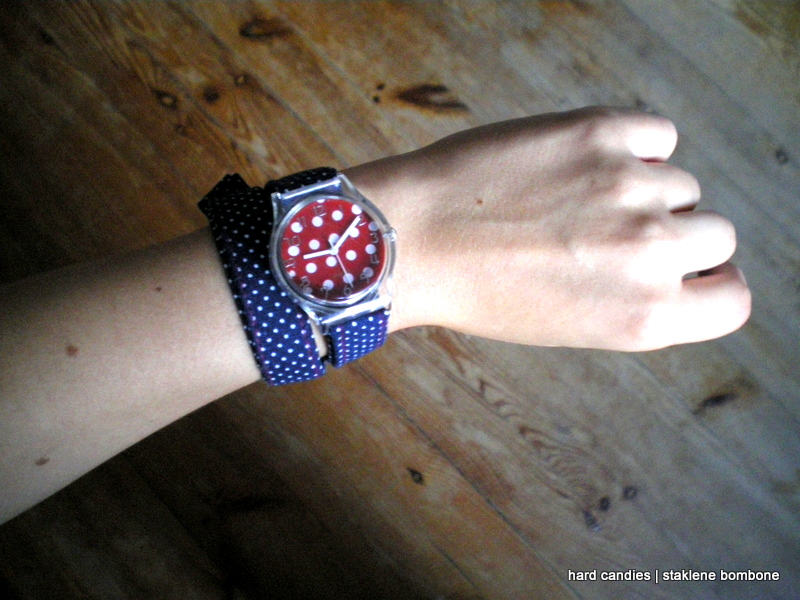
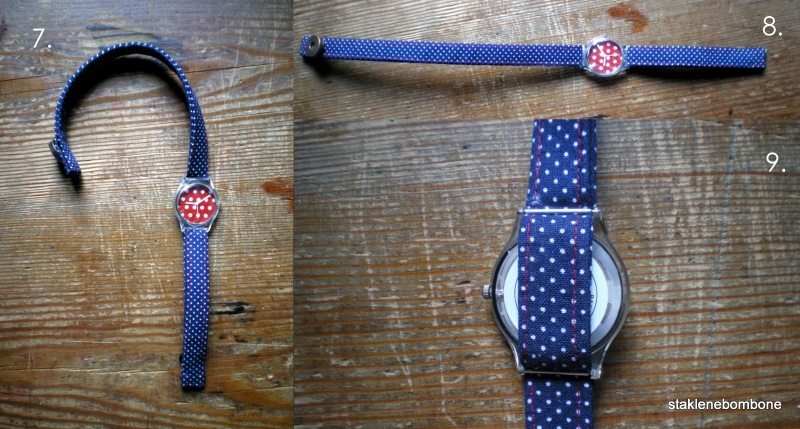 step 7, 8, 9: the belt is ready and all you have to do now is to reattach it to your watch. my watch is attached at one third of belt's length, as the longer part will fold around my wrist twice.
taaadam, we're done!
good luck!
-oh
1 comment:
Wonderful. I never thought it is easy to create. thanks for the nice idea. Black magic specialist in Bangalore
Post a Comment