
for the past months I've been having a rather peculiar living situation that I call 'being kind of homeless'. of course, I don't live on the street, I have some friendly beds and couches here and there and I'm incredibly grateful for that, but there's no place I could come to and say 'ufff, I'm finally home!'. the longer it lasts the more tiring it gets and I'm running out of ideas of how to make it sound less frustrating. nevertheless, trying to fight the frustration I thought of a little DIY that I want to share with you today... you don’t have to be an experienced crafter or buy any fancy supplies to do it, so it’s pretty much available for anyone with a few minutes of spare time:)
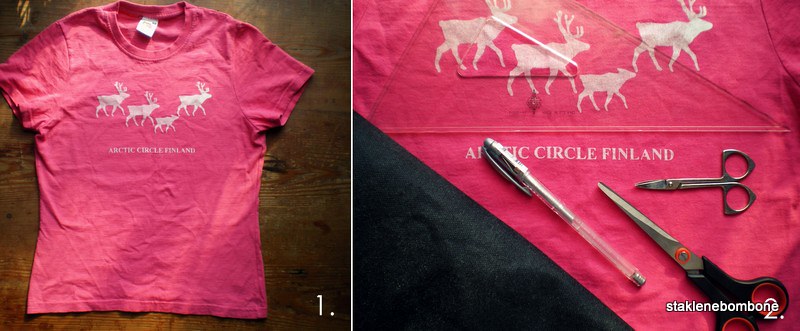
1 & 2. supplies you’ll need: t-shirt, interfacing textile, scissors, ruler, a pen that easily writes on fabric, iron, ironing board
tip: most probably you’ll find either black or white interfacing fabric, so before you buy one, make sure which t-shirt you want to use – if it’s light colour, maybe it will be a better idea to buy dark interfacing (and the other way round) to make it more visible.
you may want to get a plain t-shirt for this DIY, though I think the one with print is even better. I like a little chaos that it makes:)
3. cut a rectangle of an interfacing textile of size appropriate for your t-shirt
4. on the piece of interfacing write a word of your choice. I did it by hand, but if you find it difficult, you may use stencils instead. if you’re ambitious and want to write on the back of your textile so that no pen lines would be visible on the front, remember that the words will be converted
5. cut out the letters carefully. for curvings you may need some small and sharp scissors (I used nail scissors)
6. place your interfacing on the t-shirt to see how it looks. make the last changes
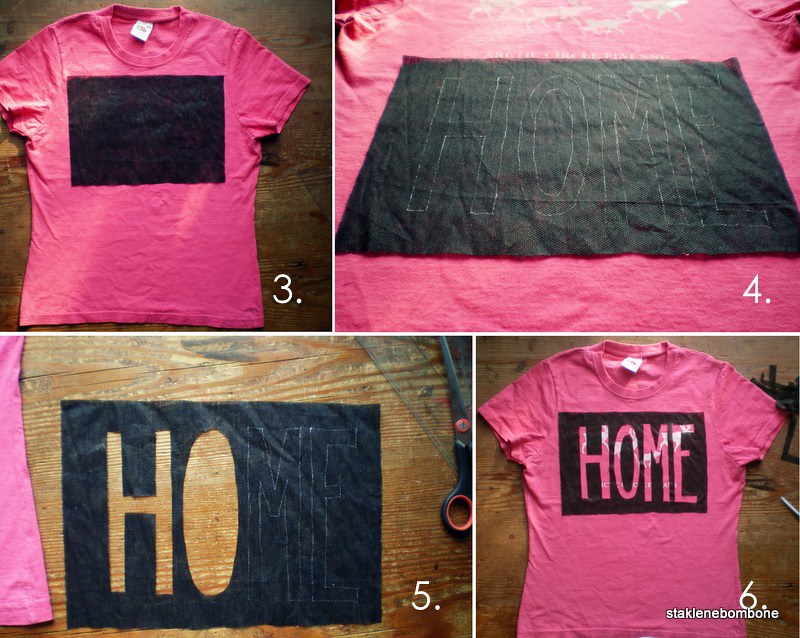
tip: when it comes to letters with ‘bellies’ like o, p, b, d etc. you may leave them ‘empty’ if you want to (left) or simply place the the lacking part inside (right), just remember not to throw it away while cutting!
 />7, 8/
4. on the piece of interfacing write a word of your choice. I did it by hand, but if you find it difficult, you may use stencils instead. if you’re ambitious and want to write on the back of your textile so that no pen lines would be visible on the front, remember that the words will be converted
5. cut out the letters carefully. for curvings you may need some small and sharp scissors (I used nail scissors)
6. place your interfacing on the t-shirt to see how it looks. make the last changes
tip: when it comes to letters with ‘bellies’ like o, p, b, d etc. you may leave them ‘empty’ if you want to (left) or simply place the the lacking part inside (right), just remember not to throw it away while cutting!
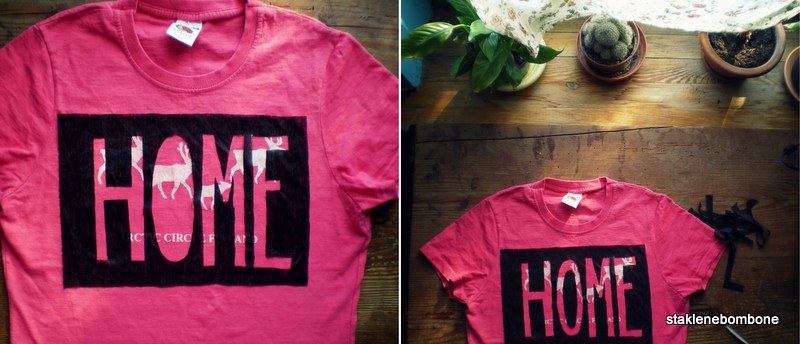
/>7, 8/ 9/ place everything on your t-shirt and see how it looks. if it’s ok, it’s time for ironing!
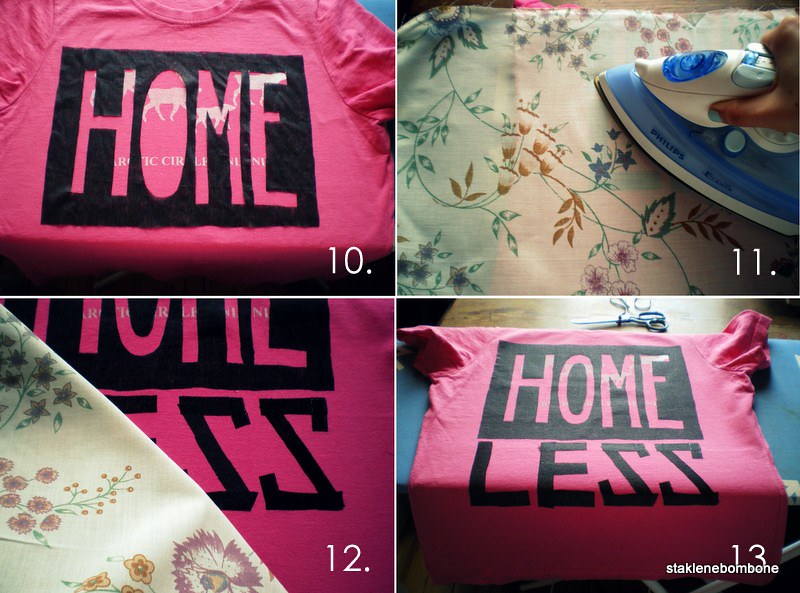
10. place the t-shirt on an ironing board, iron it, put the rectangle and make sure everything’s even and right
11. place a piece of cotton fabric on the t-shirt and iron the interfacing through it. don’t do the ironing directly on the interfacing as you may burn it. if you want to be sure that your iron isn’t too hot, make a trial run on another piece of fabric
12. do the same thing with other letters. it’s always better to divide this work into parts instead of ironing the whole thing at once. this way you’ll have a better control of how it looks
13. take off the cotton fabric and see how the interfacing sticks to the t-shirt. you may need to iron some parts for a bit longer
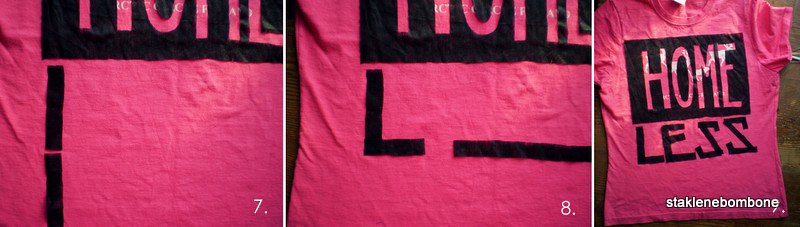
ha, now you’re ready to go!:)
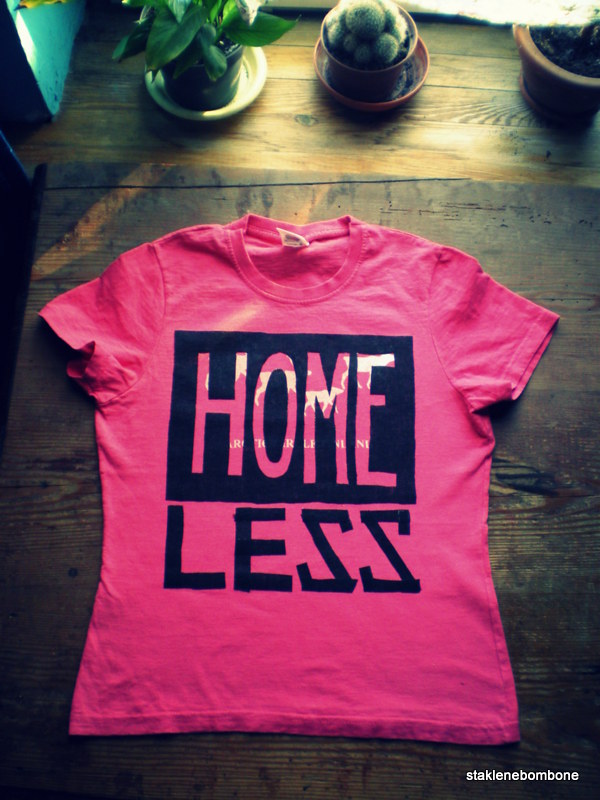
if you're handy with a sewing machine, you may try to sew the edges of the interfacing just to make sure it will stick better. I'm too lazy for that... :)
cheers!
-oh
2 comments:
hej pa ovo je odlican DIY projekat....supern ideja ;)
drago mi je da ti se svidja;)
Post a Comment